Pages

Subscribe:

Sunday, January 31, 2010

Bedroom Makeover: Nightstand Edition

So it is now time to make over our bedroom.  It’s still in the drab white that was painted with the house built.  In an effort to maximize our dollars we decided to give our current bedroom suit a make over.  There are several things wrong with it all of which I will fix over time but the first thing that hits you is it’s just plain ugly.  We still haven’t totally figured out why we bought it 10 years ago.  I guess we were young it was in our budget and we needed furniture for the house we had just moved into.  That being said how do you take a 10 year old not so good looking night stand and bring it into the new decade.  Let’s explore this in a little pictorial.


The ugly nightstand
The Ugly Nightstand, Bedroom Makeover and refinishing
I guess really it’s not all that bad but it is far from our current taste in furniture and design.  I have some ideas on how I would like to fix this guy.  The first thing that needs to happen is that I need to remove all that molding next to the drawers.  I just think it really disrupts the look of the nightstand.  So what to do…..   Find one chisel well two actually and one hammer and presto you get the following result.

The Ugly Nightstand Molding Removed
IMG_3291_1024x768
Now how did I do this?  It is not that hard really.  The molding was nailed and glued in place and my goal was to have as little tear out as possible so take one of our chisels and place it on the back edge of the molding and start tapping it breaking the glue joint and prying the molding away.  Take your time and do a little bit at a time.  You are most likely going to get some tear out, not to worry we will address that in a minute.  Eventually you will be able to pry the moldings off of the project and you get to take a cool picture like this one.


Demolition Tools
IMG_3292_1024x768
As  you can see the moldings don’t always come off in one piece no problem I had not planned on using them for anything anyway.  Now we can address any tear out that may have occurred.  There are at least  two ways of dealing with it.  One if you are planning to paint you can fill any of the tear out with wood putty if they are really bad, do this before you start any sanding, let the pudding try and sand it flush with the rest of the wood.  Now if you are going to stain the project then the putty isn’t probably a good idea as the stain at least in my experience will be soaked up more and look different than the rest of the wood.  If you are in this situation or if the tear out is not all that bad then you can do what I did.  I sanded the faces down until most of the tear out was gone and anything that was real deep I smoothed out with the sand paper and made them appear and part of the character of the project. 


A Sanding we will go…..
IMG_3293_1024x768
Here is the result of a few couple of hours of sanding.  I wasn’t worried about totally removing all of the finish that was on the nightstand previously.  I mainly wanted to get it scratched up real good so that the latex paint I am using would have something to grab a hold of and stick to.  If you can get it to bare wood all the better but I didn’t find it totally necessary on this project refinish.

 
And now through the power of the internet we have a mostly refinished nightstand.
IMG_3295_1024x768  This is the first of 2 coats of Satin Black latex paint.  I wasn’t worried about overspray so I didn’t mask off the interior of the nightstand.  Now that the main part of the night stand is taken care of lets focus quickly on the drawers.  Remove the hardware sand as you did with the main section and paint.
IMG_3288_1024x768 IMG_3296_1024x768
You can paint the sides if you want to, I decided it wasn’t needed as the drawers are closed 99% of the time.
Now that you have everything painted you can either put the hardware back on and be done or you can distress things just a little.  I spent a little time sanding off the paint in some key areas.  It is pretty hard to tell from the picture but there are several distressed areas.  I took the sand paper and sanded until I got bare wood and then took a little stain and stained over the area let it dry for just a little while and wiped the excess away.  Once I was done I had the following refinished nightstand.
IMG_3300_1024x768

So I hope you have fun taking on your own refinishing project.  If you have any questions please feel free to email.

Here is a before and after side by side:
IMG_3285_1024x768 IMG_3300_1024x768

Have a great day!  --Grover


LATEST SPRING COLLECTION..... PLANTS 2010

January 31st in Illinois; sunny, freezing, snow on the ground........

However, just returning from the 'Mid-Am' horticultural show for the industry, excitement builds with the new introductions available in Spring 2010.

Here are some of my favorites;


LILAC 'BLOOMERANG'
  • Repeat, YES, repeat bloom on and off  all spring until frost....plus they are fragrant
  • Zone 4-7,  4' high,  full sun
HYDRANGEA 'INCREDIBALL'
  • Improved 'Annabelle' meaning strong beefy stems that WILL NOT FLOP!
  • Massive flower heads in full sun  to part shade
  • Zone 5+, 4-5' tall
HYDRANGEA 'INVINCIBELLE'
  • This is major, a PINK MACROPHYLLA HYDRANGEA!
  • From the Annabelle family, not only pink but near continious blooming.
  • Zone 3-9,   3-4' high (good in containers) 
SUN PATIENS registered
  • As the name suggests, impatiens for the sun, or shade arrives in many colors
  • Thick showy petals and dark leaves
  • Drought tolerant


WEIGELA 'RAINBOW SENSATION'
  • Fragrant spring flowers are a magnet to Hummingbirds  
  • Compact and very hardy  
  • I love the foliage color of variegated chartreuse, green and pink which will stand out all season

 HOSTA  ' BLUE IVORY'
  • Maintains a true blue splash all season
  • Thick leaves are slug proof
  • Low water needs!
 

FIVE FAVORITE TRENDS

Succulents
   Low maintenance, gorgeous colors,  major texture

GREEN ROOFS
  And Chicago leads the trend. We have the most green roofs in the world for the third consecutive year running.


 Permeable surfaces; any surface that is not concrete or asphalt and allows for water penetration.

 Lose the Chemicals. Each of these "trends" will receive their own post in the future and this is a BIG topic. Here are two quick points
  1. I used to tease my Father-in-law...."Mr. Chemically Crazed".....that he could get Parkinson's Disease. His entire life was devoted to which chemical would solve every problem, in massive doses.He did and lost the battle.
  2. My own garden has it's issues; weeds, bugs.........but i have allowed an eco-system to evolve and a multitude of birds and beneficial insects have naturally kept the destructive bugs at bay.
 PS: bunnies NEVER bother my gardens, naturally. Can anyone guess my secret?   


Living walls....indoors and out

I could not say we are perpetually charming  ;-)  and try we do........but as a full landscape design/build firm, our aim is to always
"make your soul blossom"


NEXT POST.            I am so excited to extend a huge give-away, $600.00 value!

Who is eligible? Do I have to live in Chicago?  No, everyone, living anywhere is eligible
Any hints?  Yes, it is a service we already offer.... Your home and a makeover

                                                       Stay tuned...................

                                                                xxo   Debra

The Train Show at The Domes

The Train Show at The DomesJanuary 23, 2010Yesterday I posted about our visit to the Mitchell Park Conservatory (The Domes) in Milwaukee, Wisconsin. The Train Show was the featured exhibit in the show dome. This exhibit is their most popular and it is easy to see why it delights children and adults alike. I took several short videos of the trains in action. The Train Show included a free copy

Saturday, January 30, 2010

Mitchell Park Conservatory (The Domes)

The DomesJanuary 23, 2010We love visiting conservatories during the winter months. It is a lovely way to enjoy a bit of warmth and greenery. We had an opportunity to visit the Mitchell Park Conservatory (The Domes) located at 524 S. Layton Blvd. in Milwaukee, Wisconsin. The conservatory consists of three large domes with three themes. The first is the floral show dome which changes based on

What's the Big Gardening Idea?


Just how many different agastaches can I combine into a colorful, deer resistant garden design?

Agastache varieties are available in an array of shapes and colors - cool and hot. I long to group them into a mass planting beside my driveway.

Such is my dream... because agastache is my signature plant.

This underused perennial is a thing of curiosity to many gardeners, but it is one of the easiest plants to grow in tough conditions of lean soil, little water and lots of curious critters. Don't kill agastache with kindness by overwatering, fertilizing or cutting it back in the fall. The basal foliage will remain through the winter on the western agastaches (tubular flowers and small leaves) and the herbaceous agastaches (bottlebrush flowers and wider leaves) will die back.

I started my collection a few years ago, quite by accident. Last year, I began the hunt in earnest - for the best colors, longest bloom season and strongest survivors. You can take away all of my other garden plants, but please leave my agastache!

The very challenge of a new garden generates enough excitement to make me spend hours on my computer, drawing out more garden designs than I can grow in my lifetime. So, why not dedicate one big canvas and paint a swath of an agastache garden for this year's big gardening idea?

I have allocated over 600 square feet of meadow to use as my canvas. My design includes a few select companions, with similar growing conditions, to punctuate the plan in such a way to add impact to the agastache as well as add some structure and color in other seasons.

But first, I must eradicate the meadow grass and add good garden soil. I will add some small, sharp gravel to the soil to make sure the drainage is suitable for the agastache.

Finding all the agastache will be more of a challenge than doing the work. It will take a few years to take the garden to maturity. I still have testing to do before buying large quantities of any new variety. I've learned to take it slow, rather than rush a garden project to completion.

This spring will provide me with more information on which new agastache successfully overwintered from the stellar performances in the summer of 2009.

Besides the colorful garden design, there are other advantages...
  1. Deer resistant
  2. Rabbit resistant
  3. Drought tolerant
  4. Attracts butterflies
  5. Attracts bees
  6. Attracts hummingbirds
  7. Attracts Goldfinch
  8. Low maintenance
...for basing my 2010 big garden idea on agastache!

Summer 2009 (click photo to enlarge)

Words and photos by Freda Cameron, Defining Your Home, Garden and Travel.

Beginner Woodworker Tools

Today I want to talk about some of the basic tools of woodworking, some of these tools you will have some you will want and some are necessary for successful projects. 


Lets focus on small and medium sized projects:

If you are working on smaller projects you may not need a table saw or other “advanced” tools to complete the project.  Take for example the Coffee Table featured here:
IMG_3238_1024x768[1] I completed this table using only a Compound Miter Saw, a biscuit jointer, a Kreg Pocket Hole Jig, Clamps and a Random Orbital Sander sometimes referred to as a ROS.  In this scenario the the biscuit jointer is not necessary however it does make life a lot easier.  The one thing to note on this table is you want to get very straight boards.  If you get boards that are bowed or cupped meaning that there is a bend in the board and it looks like it arcs or has the beginnings of a U shape you will not get a clean joints.  There are ways to fix those issues in the wood but those required additional skills and tools which I will not get into at this time.  To build this table with the tools mentioned earlier you would use the Miter saw to cut your 2x4’s to length.  The biscuit jointer will allow you easily join the boards together, the pocket hole jig will allow you to attach the top to the base with ease and the sander is there, well to sand and prepare the wood for the stain or paint that you will be using. 


Purchasing tools:

As far as purchasing your tools you have many options you can get most of these tools at the big box stores or a Woodcraft and online.  If you are budget minded and you can order from Harbor Freight, I don’t believe you can get the pocket hole jig there but that is available at Lowes or Woodcraft.  Harbor Freight sells tools for a fair price and typically they are good quality.  You do have to be careful with what you get from them.  My biscuit jointer is one of theirs and I have had great luck with it.  My father has one of their miter saws and he loves it.  One other option if you are looking to possibly get brand names is Craigslist.  I have had real good luck with buying from Craigslist.  I purchased a Jointer and a Planer from craigslist and got both of them for less a either one of them would be now, both are brand names however both are probably 15 years old or better.  Each of those tools work great.  If you do decide to buy from Craigslist make sure you do some research on the tools ask for the model numbers if available before committing to the purchase always go look at the tools and ask to see them work.  One thing I forgot to mention is that I used was a band saw to create the taper on the legs.  You could also use a jigsaw to create the same taper and save some money on the tool. 


Well to wrap it up.  If you are beginning to woodwork I would suggest the following tools to get you started, a Jigsaw, Miter saw, Biscuit Jointer, some kind of Sander.  I briefly mentioned clamps.  These can get expensive, for a cheap alternative for the time being you could purchase some ratchet straps and use those to pull the wood together.  If you don’t already have them for around the house work I also suggest a power drill either cordless or corded.  That should get you building and allow you to tackle several projects.


Friday, January 29, 2010

Chair Design Part 2

I spent some time yesterday trying to come up with several different blends of the chairs. I think I like the last set the best and will probably be what we go with.

Chair Set #2

chairs2

I didn’t like the way the base turned out on this set of chairs.  It looks like it might be slightly unstable.

Chair Set #3

chairs3

This set of chairs is my current favorite, I like the overall design I need to fix structure underneath for support but I think these will be viable solutions.

Let me know what you think about the 3 different sets.

Thursday, January 28, 2010

The Garden Before the Storm


The snow is on the way. Our local meteorologist is confident that we're in for a big winter storm. All you gardeners up in the snow belt, please don't laugh - seven inches of snow is forecast! That's a lot for a southerner.

We did the usual things that southerners do before a storm. We went to the grocery store and bought bread and milk just like we're supposed to do. My husband has the generator ready to go in case of a power outage. We're excited about snow, but if this front moves slightly, we could get an ice storm. That wouldn't be any fun at all.

I am convinced that we're in for a snowstorm because it was 60°F here today. The worst snowstorm that I can remember followed a 75° day. So, I took advantage of this warm day to do a bit of tidying up in the garden as well as sow a few cornflower seeds.

It's rather interesting to note how many perennials retain green basal foliage during the winter in zone 7 - achillea, western agastache, coreopsis, gaillardia, mums, nepeta, rose campion, shasta daisy, stachys hummelo, solidago and verbena bonariensis.

Scabiosa 'Butterfly Blue' has just started producing buds and blooms. This little perennial is evergreen here in zone 7. Unless the snow sets it back, it will bloom vigorously through the end of spring, and sporadically through fall.

Rated for zones 4-8, scabiosa (pincushion flower) is a good, carefree, short edging plant. The plant in the photo is the oldest perennial in my garden. It is growing along my stream inside the cottage garden fence. I added several more along a path, only to find out that the bunnies will eat what they can reach. I will relocate the new plants to the same area by the stream, away from little bunny noses.

While scabiosa is not deer or rabbit resistant, it is a cheerful little perennial and a fantastic butterfly magnet!

If the snow comes, it will cover all the signs of spring. I will just have to sit inside and browse the big stack of flower and seed catalogs that arrived in the mail recently!

Scabiosa blooms in winter


Words and photos by Freda Cameron, Defining Your Home, Garden and Travel.

Chair Design

I have started working on potential chair designs for a new Dinning Table Set that I am going to be building in the near future.  My plane is to build the majority for the framing structure from 2x4’s.  The picture below is a rough sketch of what I am thinking about.  The sketch is not to scale or size currently.  I will post those once I get that taken care of and I also have a third design I am going to work up.  It will be the same principal however I will change the skirting just a little bit.  Here are the first two designs.  One thing to note is that the backs will be curved and slanted, I have not figured out how to do that yet in SketchUp.
Chairs

Wednesday, January 27, 2010

To Indiana and Back in a Weekend

On Friday we decided to head to Indiana. Why? Well as I mentioned before the hubby found out we would be moving there later this year so we wanted to check out the cities and see what town near Indianapolis we'd want to move. I've moved enough in my life that I know that you really want to research, especially when kids are involved. So we looked up a few places we wanted to visit and decided

Wordless Wednesday: Welcome to Indy


I absolutely love this picture, honestly SoccerBoy doesn't always let me catch him so this made me very happy. We had just gathered a bunch of data from the visitor's center for Indiana since we are moving there later this year. Look at the three of them. :) Happy WW!

Holy Readers Batman

Thank to all the fans of Knock Of Wood who swung by.  I am very delighted to have you here.  If you don’t mind leave me a message and tell me what you would like to see on the blog.  If you want custom designed pieces that you can build I can get into that or if you want to just continue to see the stuff I am doing in the shop that’s great as well.  I am looking for ideas to make this a fun and informative blog for the new woodworker, aspiring woodworker, and even you old pros. 

I am a fairly new woodworker.  I have always wanted to have my own shop.  I really enjoy the process of taking raw lumber and molding it into a piece of art or a functional piece of furniture.  My secret desire well okay maybe not so secret is to start building guitars.  I am a guitar player but I think I am more of a woodworker and that leads me down the road of wanting to build the instrument that I enjoy playing. 

I am hoping to start a couple new projects in the coming weeks so stay tuned.  I am going to start working on a couple of plans for some chairs and a Farm Table.  It will be something similar to what you can see at Knock Of Wood but my goal is to make it expandable for the holidays when the family comes in.

Feel free to comment or shoot me an email.

Tuesday, January 26, 2010

A Pen for my Father-In-Law

My father is a captain with a major US airline.  I had made him a pen a year or so ago and he wanted another one.  I let him hunt through my stash of blanks and he found one that looked like it could be clouds.  The more I turned it the better it got and finally came out with this.

IMG_3271_1024x718

Substitute Pulmonaria for Hosta in Deer Country


Once upon a time, I grew beautiful hostas. I lived in the shady woods, had fertile soil and could keep their roots moist with little effort. There were no deer problems at that home, so my hosta garden looked fabulous. I miss those hostas.

My growing conditions now include deer. I don't expect a hosta to survive and flourish planted in my open garden. It will be eaten - guaranteed! I don't want to take heroic measures using spray repellents nor fencing in the shady area of my garden. The cost of doing so would exceed the cost of a few hostas.

I have learned to substitute and love the plants that are happy in my growing conditions. So, what perennial can I grow instead of hosta?

Pulmonaria! Yes - there's a big pulmonaria world out there that sounds just as exciting and interesting as growing hostas.

I am putting Pulmonaria 'Silver Bouquet' PP through deer resistant trials, totally unprotected from deer, rabbits and any other critters. This is my first experience with pulmonaria and all I did was follow the growing condition suggestions on the plant tag.

The trial pulmonaria plants from Terra Nova Nurseries arrived as small plugs and were planted out in late September. After watering the pulmonaria for the first month, I have totally ignored the perennials since.

The deer and rabbits have ignored the pulmonaria, too. As a result of all this neglect, the four plants are thriving!

Pulmonaria are herbaceous, so they should die back in the winter. The fragrance garden is a protected area in winter, located on the east side of my house and I've not had the die back yet. Which means, that if the deer and rabbits were hungry enough this winter, they have sniffed out these pulmonaria as possible food and rejected this menu.

Growing conditions for Pulmonaria 'Silver Bouquet' are similar to hostas:

zones: 4-9
light: part sun to shade
size: 20" wide/7" high/10" high w/flowers

In my zone and summer sun conditions, I decided to plant the pulmonaria in a spot that is full shade with a bit of dappled morning sunlight. The soil needs to be moist, but well-drained.

The silver leaves really brighten up the ground beneath the sweet bay magnolia tree in my fragrance garden. With a mature width of 20 inches, I have spaced the plants to make a ground cover in this spot.

We use the fragrance garden in late afternoons for dining in good weather, especially in spring and fall. The pulmonaria should bloom in April - in my favorite colors, changing from pink to blue. The understory in this area is also planted with Spanish bluebells. I look forward to seeing the impact of combining these two deer resistant spring-blooming plants.

Words and photos by Freda Cameron, Defining Your Home, Garden and Travel.The pulmonaria plants were provided for free by Terra Nova Nurseries, Inc. Deer resistance may vary in your garden.

Sunday, January 24, 2010

MEET.....THE ARTIST


Meet Patrick Roullier. An amazingly talented artist, all-round nice guy and a treasured friend.

 
Raised in Michigan he now resides in Chicago. Patrick is a local master schooled in many art forms

 
His art is yummy.

Let's take a look while I introduce you to this dear man


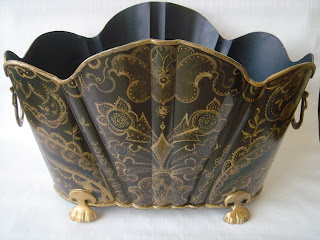
                                                       tole tray in equestrian theme
 
The arts were instilled from earliest memories. And in advance of their times, his parents rarely bought new, scouring flea markets, yard sales and second hand shops. The altering of an existing piece was a way of life.
  Father;  photographer
  Mother;  painter
  Grandfather;  woodworker
  Grandmother;  tole painter


                                                   hand painted mural

His Aunt Jackie was the component in propelling him to consider the arts as a career, "do what you love and let the money follow."


close-up

Graduating in Scientific Illustration from the school of the Art Institute in Chicago plus biology courses at Roosevelt University he planned on entering the Medical Arts.


                                           more hand painted panels

During schooling he worked at Chicago's Oriental  Institute doing maps and other archeological renderings, pot shards, designs, tombs and various artifacts.


            In a home in Naples, Florida


Exquisite topiary on lined wall


                                                  gilded cabinets

A major life change occurred at age 19 when Patrick was mentored by Anna Chiara Branca renowned watercolor and porcelain artist....Mother of Allesandra.  At Branca design he became interested in doing highly detailed work, botanical renderings and studying the masters. As a true apprentice he began by washing brushes, sanding and priming as Ms. Branca introduced him to the world of interior design and the history of European decorative arts.


                                                   hand painted mural


                                                            up close

Branca's design studio made a a life altering impression..........creative people and artisans could indeed make a living in the arts.


                                                         composition and plaster

Until the latter part of the 19th century it was common that plaster was used decoratively inside a building. Primary materials could be lime and sand plus animal or plant fibers for strength. Later adding Portland and gypsum replacing traditional lime.


tole lamps

 Next step......Frederick Cooper Lamps, painting traditional tole, faux wood and faux marble on thousands of surfaces. Patrick had the opportunity to provide custom work for Mario Buatta but the ultimate was creative license in developing a line called 'Anderson & Roullier' lamps.


                                           hand painted chest

At night he assisted an elderly lady, Judith Brubaker whom pushed Patrick into wood. Learning wood finishes, french polishing and gilded gesso. On his own he practiced throwing pottery and sculpture.


                                                               painted floor


                                               mural      Geneva, Illinois

5th;   What artists have influenced you?

Patrick Roullier;  Ghram Rust, Issabelle Oneil, Jocastas Innes,
                              who have instructive books.
                    John Fowler mostly for his resourcefulness and polished feel.
                    Albert Hadley, Billy Baldwin, Jed Johnson and Charlotte Moss
                    "I LOVE the Colefax and Fowler book!


                                               Painted and  'Japanned'

The term 'japanning' is a process of heavy lacquer almost like enamel paint. Originated in India, China and Japan as a decorative coating for pottery, reaching Europe by the 1600's. This is a costly and time consuming process achieved in many steps.
1) numerous coats
2) heat dry each layer
3) polish to a smooth glossy finish


                                                     painted furniture

5th:   What type of projects are you currently working on?
PR:   Continuing experiments with painting wall papers.
          Chinoiserie of the 18th century
          Deconstruction of traditional motifs to create a more modern custom look for clients


                                                           cache pots


Striking out as an independent artist was now within Patrick's grasp. A buzz began in town........the now closed, Urban Gardener in Lincoln Park.........had an artist creating hand painted cache pots of incredible detail. Each was different, over 200 designs a year, a real collectors item. Not yet knowing Patrick I used to stalk this shop, well maybe 4 times a year. "Who is this artist?" I would inquire, casually, nonchalant. "Sorry we do not divulge that information."


I could not blame them, my motives were not pure..........I wanted this artist for my shop, making trays.

Many many years later an artist was referred to us for an event at the shop. Trusting my friends recommendation, the day of the event arrived as did this sweet and charming (and very cute) gentleman, portfolio in hand.........IT WAS HIM!


This is my personal favorite. Look at the detail, the colorway, see the "faux" moldings!


                                                     mural  ala Zuber

In France hand painted wallpapers were the rage since 1797. Of all the French wallpaper artists Monsieur Zuber was the "creme de la creme"

Before photography this was an upper crust decorative art craze depicting far away lands and periods long lost.

                                             hand painted mural within molding


                                                       the details


                                              delicate grain over custom made stencil

 
                                                           detail


Not everyone is a fan of such high gloss techniques. Personally it resonates with me reminding me of England where most exterior doors and interior trim work have this sheen.

Another example of 'Japanning'. The ceiling detail replicates the pattern in a rug below.


                                                            up close


                                                   hand painted furniture


A subtle form of 'faux bois' in the style of a Swedish Manor home.

Afraid of heights?      Look out below!     


                                                   hand gilding wall papers

The partnership with Urban Gardener eventually set Patrick on his course of total independence. Having met so many designers, relationships were set and he was on track to an enviable position; busy, freelance artist.


                                               trompe l'oeil ceiling medallion


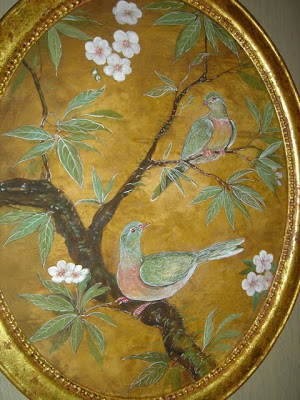
                                             gorgeous dove in a a patina of age


                                                  Lovely   


In my business I am surrounded with artists of immense talent.............it is the rare individual whom is both artist extraordinaire AND a responsible business person. Patrick is rare indeed!


One of Patrick's long standing clients has him decorate her home for Christmas every year in elaborate detail.


AND............every year the thousand's of ornaments are striped and REPAINTED by Patrick for the years new color scheme and theme..........imagine that!


As I finish this post would love to share some photo's of Patrick's he forwarded from a recent inspirational trip to Paris. The Landscape Designer in me is crazy for the photo below


As soon as I find the right components; basin and possible cabinet, we are brainstorming my next projects; two bathrooms. Tell me what you think..............as we narrow this down
1) powder room..............our family tartan.........Denny. The vintage basin would be a french iron wall fountain
2) full bath;  walls in the look of worn and aged leather. hammered nail heads, nail portion removed and glued to the wall in a pattern, all to replicate vintage traveling trunks.

Remember this?      My foyer...........BEFORE


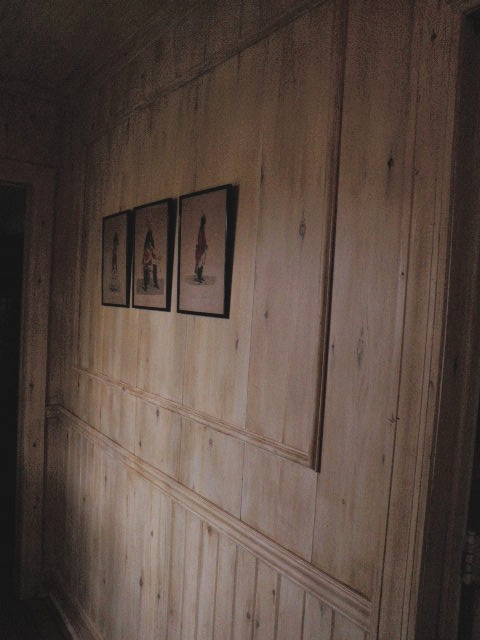
AFTER;   Faux bois paneling. Looking for an art lamp above the pictures to add a warm glow

 
All free-hand. Guests arrive and want to know when I paneled the entry, then have to stroke the walls as they cannot believe it is hand painted. I am so crazy for faux bois I am thinking of asking Patrick to paint my Mini-Cooper like the vehicle below


Had to throw in some element of folly! :-)

Love you Patrick!
contact him at;  proullier@rcn.com 


This man is someone else I admire for his over the top talent........Eddie Ross! I know, I know you are rolling your eyes thinking "what is her obsession with this guy?"
NICE BEYOND COMPARE,  TALENTED in many realms,  INSPIRATIONAL and GIVING
"Why is she writing about him again?"..................EASY he needs your VOTE!

If you have not heard, there is a big contest at Bloomingdale's in New York. Elle Decor has asked Eddie and Jaithan to represent them and decorate one of the big windows. AND.....it is a CONTEST! Two others are involved,  Apartment Therapy and Bloomingdale's themselves. but hurry! contest ends Jan. 28th.

Take a peek then go here to vote. Let's help our friend, and maybe yours too, We are discussing a visit with Eddie and Jaithan to Chicago late April (ish)

xo
Debra


Related Posts Plugin for WordPress, Blogger...